How to Make a Cute Easter Card with Hero Arts Color My World Stamp & Cut
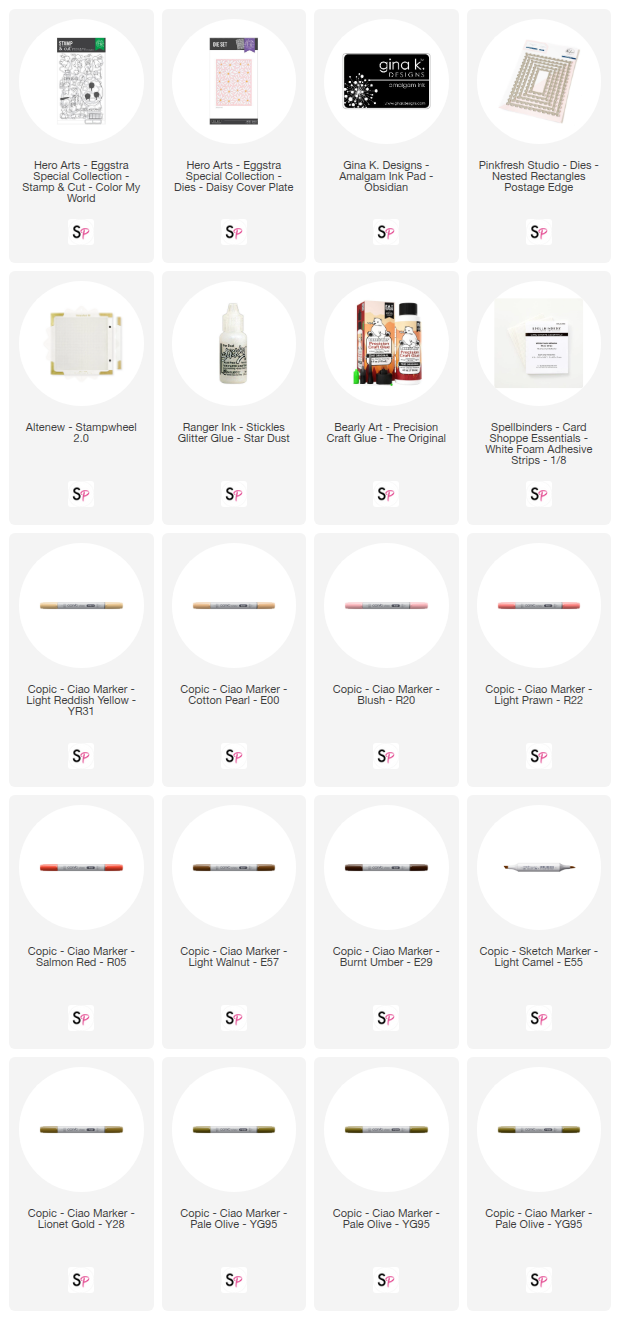
Hello crafty friends! Today I’m sharing a playful Easter themed handmade card featuring the Hero Arts Color My World Stamp & Cut set paired with the Hero Arts Daisy Cover Plate Die. This project combines stamping, Copic coloring, die cutting, and layered paper techniques to create a cheerful spring card full of personality.
If you love cute critters, creative die layering, and colorful cardmaking techniques, this project is a fun way to bring them all together.
Stamping the Images
I started by stamping the adorable bunnies, chicks, and accessory images from the Hero Arts Color My World Stamp & Cut set onto smooth white cardstock suitable for Copic coloring.
To ensure crisp impressions, I used the Altenew Stampwheel, which makes it easy to stamp detailed images and restamp if needed.

For ink, I chose Gina K Designs Amalgam Ink Obsedian, which is perfect for alcohol marker coloring because it creates sharp lines that won’t bleed when using Copic markers.
Coloring the Critters with Copic Markers
Next, I colored the stamped images using Copic markers to give the bunnies and chicks a soft, warm look.
The colors used for this project include: YR31, E00, R20, R22, R05, E57, E29, E55, Y28, YG95, W1, W2
These tones create natural bunny fur shades while adding cheerful pops of color for the accessories and chicks.

Once the coloring was complete, I used the coordinating dies from the Hero Arts Color My World Stamp & Cut set to cut out all the critters and accessories.
Creating the Decorative Filigree Easter Egg
The focal point of this card is the decorative filigree style Easter egg.
To create it, I used the Hero Arts Daisy Cover Plate Die to cut an intricate floral pattern from white cardstock.

Next, I adhered the white die-cut layer over a colorful patterned paper from my stash. This allows the bright colors to peek through the daisy openings, creating a beautiful layered design.
After adhering the layers together, I used the egg-shaped die from the Hero Arts Color My World Stamp & Cut set to cut the decorative egg from the layered panel.
The result is a custom patterned egg with delicate floral details.
Assembling the Card
For the card panel, I used the Pinkfresh Studio Nested Rectangles Postage Edge Dies to create a stitched background that adds subtle texture and interest.
I then arranged the bunnies and chicks around the decorative egg to create a playful scene where the critters appear to be painting the egg. These were adhered using Spellbinders Foam Adhesive tape for added dimension.
The sentiment “You color my world” was stamped and die cut from the Hero Arts Color My World Stamp & Cut set, tying the creative theme together perfectly.

To finish the card, I added Glitter glue to the fluffy bunny tails and to the centers of the daisy flowers on the egg.
These small details add a fun shimmer and bring extra life to the design.

The Hero Arts Color My World Stamp & Cut set is perfect for playful scenes, and the Daisy Cover Plate Die adds beautiful texture that works wonderfully for spring and floral designs.
Thank you so much for stopping by the ScrapbookPal Blog today!
Happy crafting ✂️
Sweta
@Table_in_the_Attic