


Hello everyone! It’s Sweta here, and I am thrilled to be back on the ScrapbookPal.com blog sharing a delicate, high-texture project that feels softly vintage and entirely elegant. Today, I wanted to experiment with an understated, sophisticated palette. I went for an almost "white-on-white" effect featuring crisp embossed patterns and pristine die-cut lace, accented with just the softest hints of blush pink peeking through the layers.
To achieve this tailored, shabby-chic look, I brought together amazing elements from the Spellbinders Buttons & Keepsakes Collection and intricate textures from Pinkfresh Studio. Grab a cup of tea, and let’s dive into how this elegant layout came together step-by-step!
Step 1: Embossing the Intricate Fabric-Textured Base
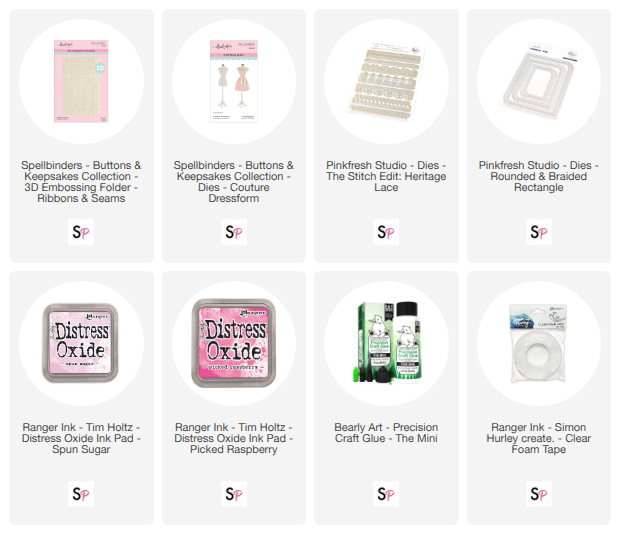
To build an elegant card, you need a tactile foundation. I started with a premium A2 white cardstock panel and ran it through my die-cutting machine using the exquisite Spellbinders Buttons & Keepsakes Collection Ribbons & Seams 3D Embossing Folder.
The depth of this folder is stunning—it presses a beautiful, deep texture of dotted diamond grids and delicate flowing bows directly into the paper, mimicking fine fabric ribbons. This served as our crisp white background panel.

Step 2: Framing the Layers with Soft Pink Accents
Next, I wanted to create a structural frame to sit in the center of the card. I selected the gorgeous Pinkfresh Studio Rounded & Braided Rectangle Dies to die-cut a detailed frame from white cardstock. This die cuts out tiny, alternating oval and dot window details along the edge.
To add my very first hint of color, I cut a second piece of soft pink cardstock and layered it directly behind the white braided frame. The subtle blush tone peeks through the tiny die-cut windows perfectly, creating a beautiful border definition without overwhelming the clean palette.

Step 3: Layering the Heritage Lace and Inked Backdrop
With our background frame set, it was time to build our central focal block using a mix of intricate lace and soft color.
First, I took the smallest die from the Pinkfresh Studio Rounded & Braided Rectangle Dies and cut a clean panel from white cardstock. Next, I used the Pinkfresh Studio The Stitch Edit: Heritage Lace Dies to die-cut our exquisite lace trims out of stark white cardstock.
To build the textured background, I adhered the smaller lace strips horizontally across our small braided panel. Using my detail scissors, I trimmed away the excess lace hanging off the edges, being careful to maintain the clean, rounded shape of the braided corners.
Once the lace was secured, I brought in my ink blending brushes! I lightly blended Ranger Ink Tim Holtz Distress Oxide Ink Spun Sugar and Picked Raspberry directly over the entire paneled piece, including the lace. This created a gorgeous, seamless pink ombre gradient across the textures. To elevate the shabby-chic vibe, I lightly dry-brushed some white acrylic paint over the ink-blended lace to give it a beautifully faded, vintage fabric look.
Finally, I took the larger lace pieces from the set and adhered them so they are nestled in between our medium braided pink-backed frame (from Step 2) and this newly decorated small center panel, allowing the delicate white lace wings to spill out gracefully from the sides of our central block.

Step 4: Crafting the Glistening Couture Dressform
With the beautiful textures set, it was time to design the main attraction! I used the gorgeous gown from the Spellbinders Buttons & Keepsakes Collection Couture Dressform Dies.
I cut the main dress silhouette out of white glitter cardstock to give it a stunning, bridal-like luminescence. Then, I die-cut the dress seams, overlay details, and a tiny structural waist sash from smooth white cardstock, gluing them on top to create realistic folds and shading. I added just a microscopic touch of soft pink ink to the very edges of the dress trim to tie the entire color story together.

Step 5: Final Assembly and Sentiment Placement
For the sentiment, I pulled out a classic favorite—the "Stitched with Love" banner from an older Spellbinders hot foil plate collection.
I brought the card together by gluing the textured bow-embossed base flat to an A2 card base. Next, I mounted the braided rectangle frame in the center, extending the delicate white Heritage Lace strips horizontally across the design. I used Ranger Ink Simon Hurley Create Clear Foam Tape to pop up the dressform and the sentiment banner for beautiful dimension. To finish, I scattered a few iridescent gems across the card to catch the light.

I love how editing your color palette down to whites and soft pastels completely lets the textures and die-cut details tell the story. This design is perfect for bridal showers, birthdays, or general "thinking of you" cards for the sewing and crafting lovers in your life. Happy crafting, and I'll see you in the next tutorial!
Happy crafting ✂️
Sweta
@Table_in_the_Attic
Supplies Used:


Comment
So pretty! I love all the layering you did with those border dies…GREAT JOB!